

How Much Does It Cost To Repair Home Button On Iphone 5
Introduction
Get back home with a new home push button for your iPhone 5.
You can too utilize this guide to supercede the home button subclass.
Video Overview
-
-
If your display glass is cracked, keep further breakage contained and prevent actual impairment during your repair by taping the glass.
-
Lay overlapping strips of clear packing tape over the iPhone's display until the whole face is covered.
-
-
-
Power off your iPhone before beginning disassembly.
-
Remove the two 3.half dozen mm Pentalobe screws side by side to the Lightning connector.
-
-
-
Regardless of the tool you apply, you lot need to be sure you pull up the entire display.
-
If the drinking glass begins to separate from the plastic, as shown in the first epitome, slide a plastic opening tool between the plastic frame and the metal phone body to pry the metal clips out of the example.
-
-
-
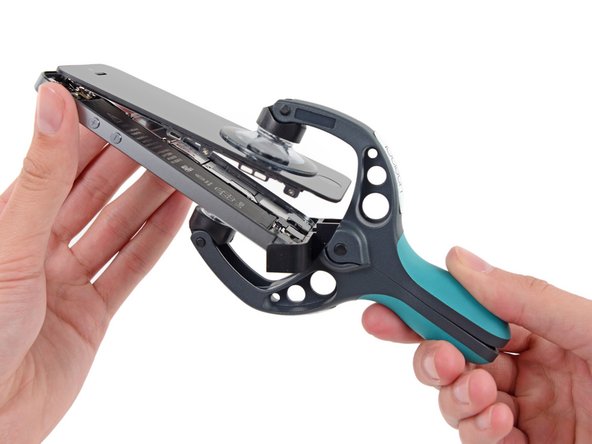
Close the handle on the iSclack, opening the suction-cup jaws.
-
Identify the bottom of your iPhone in between the suction cups, against the plastic depth gauge.
-
The height suction cup should remainder just to a higher place the domicile button.
-
Open the handles to close the jaws of the iSclack. Center the suction cups and press them firmly onto the pinnacle and bottom of the iPhone.
-
-
-
Agree onto your iPhone securely and close the handle of the iSclack to separate the suction cups, pulling the front panel up from the rear instance.
-
The iSclack is designed to safely open your iPhone just enough to separate the pieces, but not enough to harm any cables.
-
Peel the two suction cups off your iPhone.
-
Skip the next three steps and continue on Step 9.
-
-
-
Press a suction loving cup onto the screen, just above the home button.
-
-
-
While belongings the iPhone downwards with one hand, pull up on the suction cup to slightly separate the front console assembly from the rear case.
-
With a plastic opening tool, begin to gently pry the rear case down, away from the screen, while you pull up with the suction cup.
-
-
-
Go along to pry up effectually the sides of the front console assembly, detaching the clips forth the left and right side.
-
-
-
Once the clips have been released on the bottom and sides of the front console associates, pull the bottom of the assembly abroad from the rear case.
-
Open the display to virtually a 90º angle, and lean information technology against something to go along information technology propped up while you lot're working on the telephone.
-
Add a rubber band to proceed the display securely in place while you piece of work. This prevents undue strain on the display cables.
-
-
-
Remove the following two screws securing the metal battery connector bracket to the logic board:
-
One ane.8 mm Phillips screw
-
Ane 1.half-dozen mm Phillips spiral
-
-
-
Remove the metallic bombardment connector bracket from the iPhone.
-
-
-
Use a plastic opening tool to gently pry the battery connector up from its socket on the logic lath.
-
-
-
Remove the following screws securing the forepart panel assembly cable bracket to the logic board:
-
Two 1.ii mm Phillips screws
-
One 1.6 mm Phillips screw
-
-
-
Lift the display cablevision bracket toward the battery to unhook it, and remove it from the iPhone.
-
-
-
Use a plastic opening tool or a fingernail to disconnect the three front panel assembly cables:
-
Front-facing camera and sensor cablevision
-
LCD cablevision
-
Digitizer cable
-
-
-
Remove the front console associates from the rear instance.
-
-
-
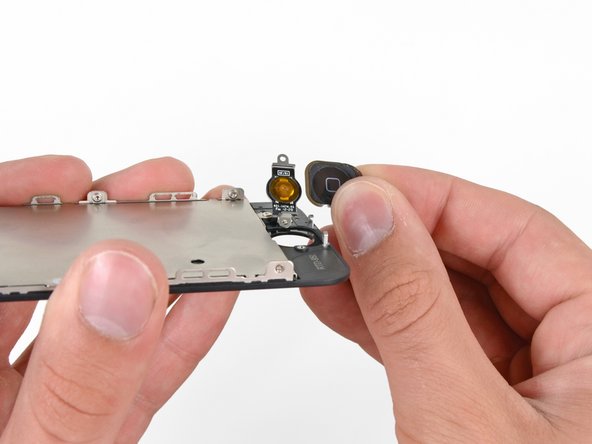
Remove the 2 one.3 mm Phillips screws securing the home button subclass to the display associates.
-
-
-
Gently flip the home button subclass to the right.
-
-
-
Gently press up on the centre of the home button from the display side of the brandish assembly, to loosen the agglutinative securing information technology to the assembly.
-
-
-
In one case the home button has started to carve up from the brandish assembly, use the tip of a spudger to completely lift the button from the adhesive securing it.
-
Remove the dwelling house button from the display assembly.
-


Conclusion
To reassemble your device, follow these instructions in reverse lodge.
Embed this guide
Choose a size and copy the code below to embed this guide every bit a small widget on your site / forum.
Preview

Source: https://www.ifixit.com/Guide/iPhone+5+Home+Button+Replacement/10594
Posted by: christiansencoputere.blogspot.com
0 Response to "How Much Does It Cost To Repair Home Button On Iphone 5"
Post a Comment